How to install WordPress on Ubuntu
Want to install WordPress on Ubuntu by yourself? If you are the DIY type, then read on to discover how it is done.

The practicality of WordPress has made it the darling of the internet, accounting for over 30% of all hosted websites in the world, plus a 60% dominance among content management systems.
Although it started as an easy-to-use blogging platform, WordPress has also grown to include so many features. And this makes it a great tool for building many types of websites.
Many hosting providers offer one-click WordPress installations. But if you are the type that likes to do things on your own, or you simply want a more up-to-date installation, then this guide is for you.
Pre-requisites: Update or upgrade your LAMP
WordPress requires a LAMP (Linux Apache MySQL PHP) stack to run or something similar. And since you have got Ubuntu, which satisfies the Linux requirement, you also need to make sure the other components are installed and ready, before adding WordPress. Please note that WordPress can run on Windows but works best on Linux. Also, you can replace Apache with an alternative like Lightspeed. But this guide is focused on LAMP.
You may also want to upgrade the system to make sure you are using only the latest packages. As of January 2021, for instance, WordPress is available in version 5.6, and it requires PHP from version 7.4 upwards and MySQL from 5.6 upwards. This guide assumes you are running Ubuntu 20.04.
To upgrade your Ubuntu system, enter the following commands:
sudo apt update
sudo apt upgrade
Graphical vs Command-line Installation
You can install the LAMP and WordPress packages either through the command line or using a graphical tool like the Ubuntu Software Center. But please note that the latter is only possible if you are running an Ubuntu Desktop environment.
This step by step tutorial assumes you are installing the packages on a server environment without a graphical user interface.
If you are in a Desktop environment, you can also use the terminal. Or you can complete steps 1 to 3 using the Software Center, then continue the installation from Step 4.
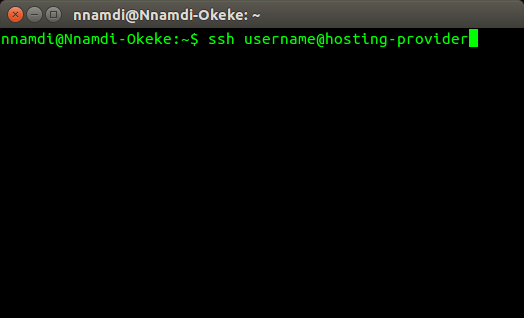
To log in to your remote host, type:
ssh user@hostname #use the information from your host
How to install WordPress on Ubuntu
Follow these steps to install WordPress on Ubuntu:
Step 1. Install and Configure Apache
Nothing works on the world wide web without an HTTP (HyperText Transfer Protocol) server. So, you first need to check if you have a server running. And if not, you install one. We will be using Apache2.
To check if Apache is installed, run:
sudo systemctl status apache2
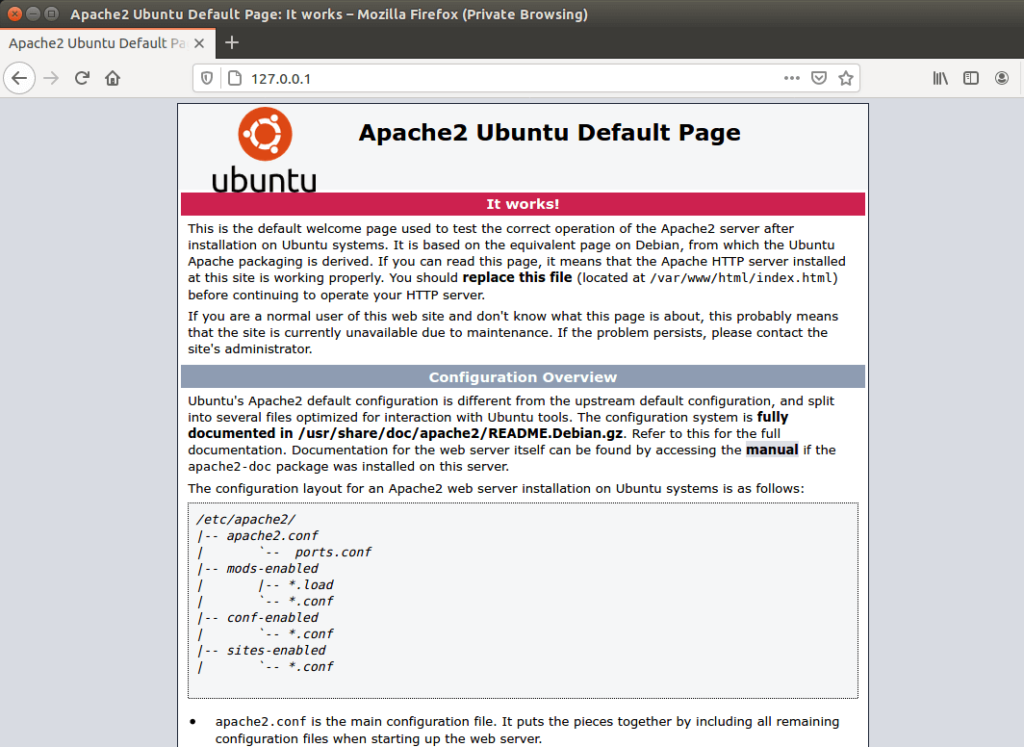
Or type your server’s IP address into your web browser. If Apache is on the local machine, then type 127.0.0.1 into your address bar. You should see a similar page:
<Apache start page pic>
If Apache is not installed on the system, then install it using the following command:
sudo apt update
sudo apt install apache2
Next, check the applications available for the Ubuntu firewall UFW using:
sudo ufw app list
It should print something like:
Available applications:
Apache
Apache Full
Apache Secure
OpenSSH
You can allow full HTTP and HTTPS traffic by selecting ‘Apache Full’ or allow only HTTPS by selecting ‘Apache Secure’. For example:
sudo ufw allow ‘Apache Secure’
Step 2. Install and Configure MySQL
Once your Apache is installed and running, the next step is to install MySQL. You can do this by entering:
sudo apt install mysql-server
This will install everything necessary to run the database on your server, including a client for the shell environment. It will ask you to enter a root (administrator) password, but you are free to either enter it or leave it blank for later, during the configuration.
After installation, secure the installation with the following command:
mysql_secure_installation
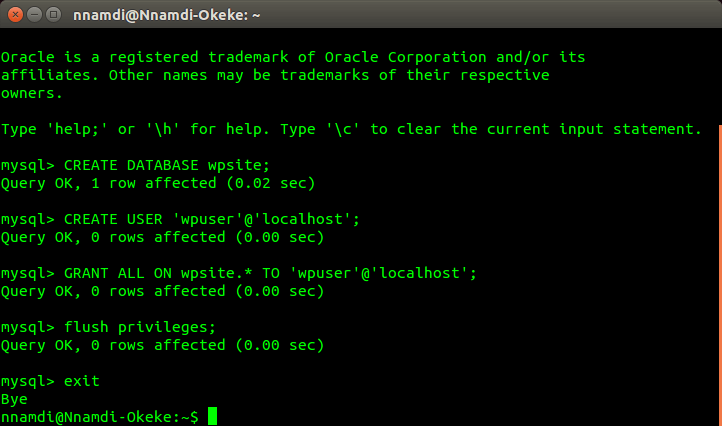
It is best to answer ‘yes’ to all its suggestions. Then log in using the shell client and create a database and a user account for WordPress. Here is how you do it.
mysql -u root -p #then enter your password
mysql> CREATE DATABASE wpsite;
mysql> CREATE USER ‘wpuser’@’localhost’ INDENTIFIED BY ‘password’;
mysql> GRANT ALL ON wpsite.* TO ‘wpuser’@’localhost’;
mysql> FLUSH PRIVILEGES;
mysql> EXIT;
Step 3. Install and Configure PHP
Now is the time to install the PHP part of the LAMP setup. This is straightforward too, just enter:
sudo apt install php php-mysql
Or you can choose to install PHP with all its popular extensions for running WordPress at a go by typing:
sudo apt install php php-mysql php-gd php-mbstring php-curl php-intl php-zip php-xml php-xmlrpc php-soap
Finally, use nano or your favorite editor to create an index.php file in your Apache webroot and save it. It can contain a simple PHP script like:
<?php
phpinfo();
?>
nano /var/www/html/index.php
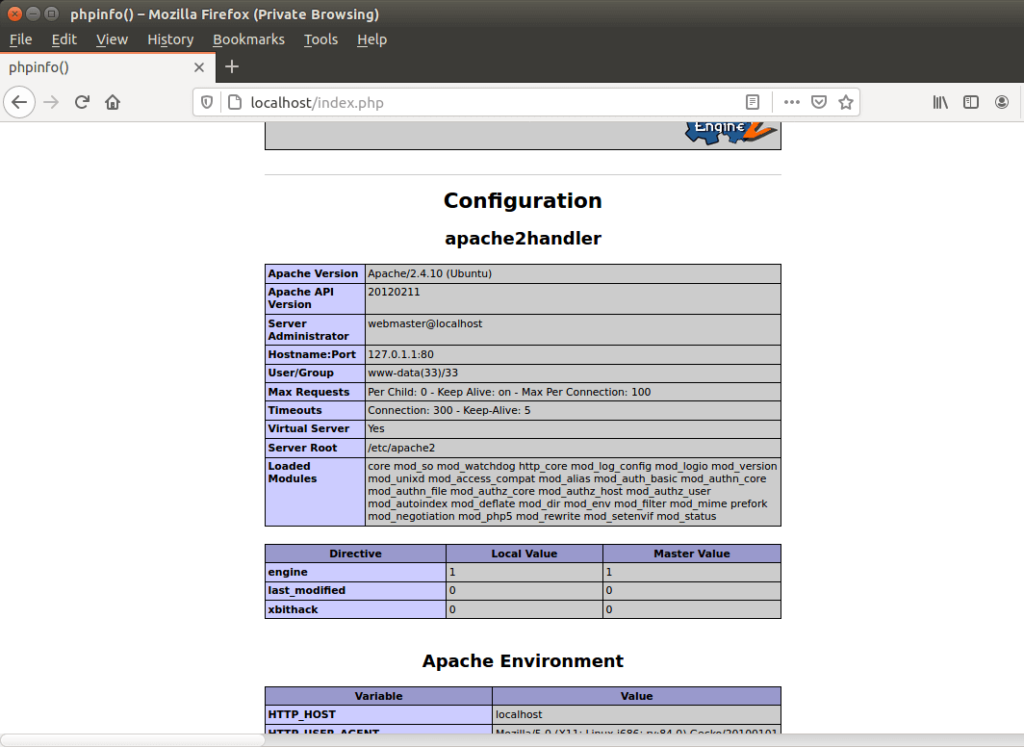
Then visit your Apache server on your browser to confirm that PHP is working at:
website-ip-address/info.php
If you are on a local machine, you can visit:
localhost/index.php or
127.0.0.1/index.php
Please note that your Apache HTTP server is configured to serve *.html files first before *.php files. And as you now have both file types in the ‘html’ folder, simply entering your website’s IP address will show you the Apache HTML welcome page.
To serve PHP by default, you will need to update some configuration files and restart Apache:
sudo nano /etc/apache2/mods-enabled/dir.conf
<IfModule mod_dir.c>
DirectoryIndex index.html index.cgi index.pl index.php index.xhtml index.htm
</IfModule>
The file should look like the above. Just swap index.html with index.php and save. Then restart Apache for the changes to take effect, with:
sudo systemctl restart apache2
Entering just your website-ip-address, or localhost / 127.0.0.1 will now serve index.php by default.
Step 4. Install and Configure WordPress
Now is the time to download and install WordPress. You do that with the following commands:
cd /tmp #switch to the temporary directory
wget -c http://wordpress.org/latest.tar.gz #download the file
tar -xzvf latest.tar.gz #extract
sudo cp -R wordpress /var/www/html/wordpress #move to your html folder
sudo chown -R www-data:www-data /var/www/html/wordpress #set owner (Apache group)
sudo chmod -R 775 /var/www/html/wordpress #set execution rights
Step 5. Further Tweaks
Up until now, we have worked with only your website-ip-address. To configure your WordPress installation to work with your domain name, do:
sudo nano /etc/apache2/sites-available/mysite.com.conf
It should look like below, just change mysite.com to your domain.
<VirtualHost *:80>
ServerName mysite.com
DocumentRoot /var/www/html/wordpress
ErrorLog ${APACHE_LOG_DIR}/error.log
CustomLog ${APACHE_LOG_DIR}/access.log combined
<Directory /var/www/html/wordpress/>
AllowOverride All
</Directory>
</VirtualHost>
Then enable Apache’s rewrite module using:
sudo a2enmod rewrite
These steps should provide you with those fancy and human-readable URLs like:
mysite.com/my-first-wordpress-post-url
To finish the setup, run:
sudo apache2ctl configtest #check that everything is okay
sudo a2ensite mysite.com.conf #add the new domain configuration
sudo systemctl reload apache2 #restart the server
Step 6. Run and Test
The WordPress setup is complete, but you still need to run the final installation. You do this by navigating to your WordPress folder on your browser and following the instructions:
website-ip-address/wordpress or
mysite.com (if you set a virtual host)
You will need to create a user account and enter the MySQL database details you created before. Finally, hit the installation button and that’s it.
Conclusion
Congrats if you have come this far. Installing WordPress manually is not as easy as those simple one-click options, but it is very satisfying. It also allows you to customize your server as you wish.
Keep in mind that this is just the start. You may need different WordPress plugins or PHP extensions down the line, and they may require you to do additional work on the server.

