How to host a super-fast website for free on Netlify
Are you considering hosting your Jamstack site on Netlify, but still not sure how to go about it and what to watch out for? Here is a quick guide to help you.
Jamstack sites are super fast because they serve static files. They use so little CPU and server resources overall that platforms like Netlify can offer free and good-quality hosting.
Netlify is a cloud-computing environment. But unlike other cloud platforms like AWS and Google Cloud, Netlify is simple and easy to use. No complicated tutorials and no lengthy setups.
The Netlify service aims to make your life as easy as possible by combining the best of different worlds into one service: cloud computing, the Jamstack, Git repositories, and freemium pricing.
Netlify & The Jamstack
Netlify has been part of the Jamstack movement for a long time and is one of the earliest and best platforms that contribute to the growth of this modern web-design method.
The Jamstack movement combines JavaScript, APIs, and Markup to create a front-end development methodology that separates itself from the back-end. This results in better server performance, better security, easier scaling, and cheaper running costs.
GitHub, for instance, initially offered web hosting to files that are hosted on its platform, but the service had its limits. Then Netlify took the building of website code from repositories and the hosting of its static variants to a whole new level. And this has created a completely new industry with many benefits.
Reasons to use Netlify
Netlify means so many things because it does so many things. By combining many features into a single service and automating as much of it as possible, the platform offers great benefits for businesses of all sizes.
The following are the major advantages you can get from Netlify:
- Ease of Use – Netlify is one of the easiest to use cloud hosting platforms out there. There is no need to read long and confusing tutorials. No complicated setup steps to follow, or even more complicated maintenance routines. Netlify just works.
In addition to it all, the system offers elastic computing features like other cloud environments. This guarantees that when the time comes, your website or service will scale gracefully to handle traffic spikes without the usual backend bottlenecks. - Content Distribution Network – As part of its simplicity and ease of use, the Netlify service includes a content distribution network called Netlify Edge. It deploys your web pages across multiple locations, to serve them as quickly as possible to nearby visitors.
The great part of this service is that you do not need to tweak and configure any settings to get the best results. Once you deploy your site, you update all your web assets and code at once. All caches are instantly invalidated and updated across the globe. And you can also roll back your site to previous builds easily and instantaneously.
Netlify manages most of this automatically for you. The only difference is in the number of services and edge locations you get, as the free plan has some limits. - Free Plan – Netlify is a freemium software-as-a-service platform. But unlike other cloud-computing platforms, the free account is completely free. No credit card is needed.
Still, this free plan includes many impressive features. Such as automated Git builds, edge network deployments, instant rollback to previous versions, live previews before deploys, and free serverless functions. - Automated Builds – You also get Netlify Build for free. This CI/CD (Continuous Integration/Continuous Deployment) makes it easy to manage your site developments and enhancements. It automatically rebuilds from your repository, each time you push new updates to your Git account.
Everything is fully automated and previews are available to let you know what you will deploy. You can also configure each step of the process and rollbacks to any previous builds are effortless. - Netlify Functions – Each site you deploy on the Netlify platform comes with access to serverless functions that you can use for a lot of things. These Netlify Functions are server-side processes that run on JavaScript code.
Each site gets 125K invocations for free and you only need to pay when you go past that quota. You can use the functions for handling images, sending emails, validating user input, and even fetching data from other API endpoints. - Automatic Forms – Netlify makes it easy to integrate forms into your static site and capture all the submissions without extensive coding or other stressful issues. Simply add the ‘netlify’ attribute to any of your forms like <form name=”contact” netlify>…</form> and that’s it.
You can then view all submissions in your dashboard, with the forms carefully arranged by name. The system comes with an anti-spam feature and Netlify can further notify you via email, Slack, or webhooks once there is a submission.
Other options include forwarding the submitted forms to 1,000+ applications using Netlify’s Zapier integration. - NetlifyCMS – The NetlifyCMS app is a convenient editor for any static site hosted on the Netlify platform through a Git provider like GitHub. It takes all your data from the repository and creates an easy-to-use management interface.
NetlifyCMS is a single-page React app built by a community of over 100 contributors. It is editor-friendly, offers an intuitive workflow, is completely free, and makes management of Jamstack sites fun. - Free HTTPS – All Netlify hosting accounts include free HTTPS. That is free SSL (Secure Socket Layer) certificates.
Accounts & Pricing
Netlify is a freemium software service. There is a completely free Starter plan, a Pro plan for $19 per member per month, a Business plan for $99 per member per month, and an Enterprise plan with custom pricing.
The impressive thing about Netlify is that you can get a lot done with its free Starter plan. Designed for personal projects, experiments, hobby sites, and other adventures, the Starter plan includes automated builds with 300 free build minutes per month.
It also includes global edge deployments, instant rollbacks, the NetlifyCMS, serverless functions, 100 GB bandwidth per month, and up to 100 free form submissions per site per month. Plus, you can host an unlimited number of sites on the Starter plan.
The Pro plan adds more features like password-protected sites, background functions, more build minutes and bandwidth, plus many more. These additional features increase as you move toward the higher plans.
How to host a website free on Netlify
Netlify beats other cloud-computing and hosting companies like AWS, Google Cloud, and Azure for simplicity. Yes, they have more infrastructure, more powerful machines, and data centers around the globe, but their setup can be a bore.
Here is a step-by-step setup process that shows you how easy it is to host a Jamstack site on Netlify.
1. Sign Up & Login
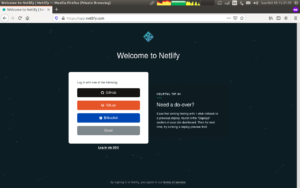
Your first step is to navigate to app.netlify.com and sign up if you haven’t. You will be greeted with five different sign-in methods, from GitHub to GitLab, Bitbucket, Email, and SSO.
After signing up, you will also need to log into your email account to find the confirmation mail from Netlify. Click on it to verify your account and log into the system.
2. Add a New Site
The app takes a few seconds to load. Then you are presented with a short questionnaire that includes stuff like your team’s name and so on. Just fill everything out honestly. But remember that the free plan includes only one member – you.
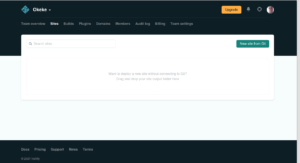
Once you are through that stage, then you will find yourself in the default dashboard. Click on “New Site from Git” to host a new site. Or you can also drag and drop a folder containing your static files into the marked area on the dash and Netlify will do the rest.
3. Link GitHub
The button click from step 2 above will open a new window that prompts you to link your new site with GitHub, or any other Git repository like GitLab and Bitbucket. At this point, make sure that you have a registered Git account and that your site’s files are already in a repository.
Now you will just need to tell GitHub to allow Netlify access your GitHub account and everything is settled.
5. Select your Repository
Each standard Netlify site is linked to a single repository. Select the one you wish to use and move on.
6. Configure Build Settings
You will need to pay a little attention to this page. If you already have static sites and not using any pre-processors, then you can set the publish directory to “/”. And leave the build command field empty.
If you are using a static site generator like Gatsby or Next, on the other hand, then what you enter here will depend on the generator. You can check out this list of common configurations, to know what to enter.
7. Build & Deploy
Once everything is set, click on “Deploy Site” and Netlify will run all necessary builds and create your shiny new website. Just have a little patience.
8. Set up the Domain Name
After building and deploying your site, Netlify will give it a name on the *.netlify.app domain. You can later change this name into something nicer or even attach a custom domain to the site.
Netlify allows you to attach a custom domain that you bought elsewhere or to buy the domain through your Netlify dashboard. And the system will take care of everything. Just click on the Domains tab in your dashboard to either add or register a new domain for your new site.
Conclusion
We have reached the end of this simple guide on hosting a super-fast website for free on the Netlify platform. And you have seen the reasons and the way to do it.
It is now left for you to either code your static site by hand or use a static site generator.

