How to Install Kali Linux
Want to install Kali Linux to check out penetration testing? This guide shows you how to do it in a few and simple steps.

Kali Linux is the most popular distribution for penetration testing. It comes packed with security and forensic tools which make it the number #1 choice for ethical hackers.
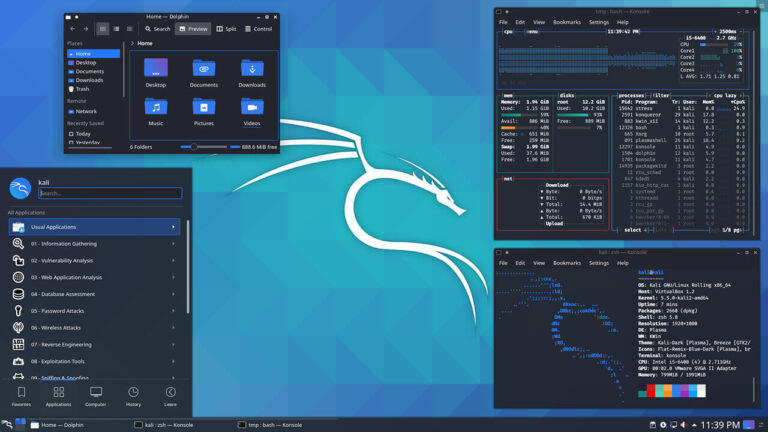
Developed by “Offensive Security”, Kali Linux is a Debian-derived distribution just like Ubuntu. It comes with Xfce as its default user interface and the system is also available for Android devices as Kali NetHunter.
The installation includes over 600 tools by default. Some of the most popular include the Nmap port scanner, Aircrack-ng for wireless networks, John the Ripper for cracking passwords, and Wireshark for network packet analysis.
A Kali Linux installation is simple and possible in the following three ways:
A. On Windows 10
B. On a virtual machine
C. On a PC or laptop
On Windows 10
Microsoft offers the Windows Subsystem for Linux (WSL) as a way to run Linux operating systems on a Windows 10 machine. You get a shell environment and can use most of the system’s tools as though you were really on a Linux box.
While this is great, you should note that it is not a replacement for a standard Kali install with direct hardware access, because Windows still places some limitations.
It has its benefits, however, such as being easy to install and use, needing no hard-disk changes, and for programmers, it offers a quick way to test Linux apps.
To install Kali Linux on Windows:
1. Update your Windows machine to make sure you are running the Windows 10 Fall creator’s update at least if you want to install WSL 1 or the Windows 10 May 2020 update if you want WSL 2.
2. Enable the WSL 1 feature on Windows by entering the following commands as an administrator on a PowerShell:
dism.exe /online /enable-feature /featurename:Microsoft-Windows-Subsystem-Linux /all /norestart
And if you prefer WSL 2, then enter:
dism.exe /online /enable-feature /featurename:VirtualMachinePlatform /all /norestart
3. Restart your computer
4. Click on the Start menu and launch the app store. From here, just search for Kali Linux and install it like any other app.
5. After installation, just launch Kali Linux like you would launch other windows apps and enjoy.
On A Virtual Machine
There are two ways to install Kali Linux on a virtual machine. The first method is to download the Kali ISO image file and install it on the virtual machine following the steps in the next section ( C. Full Installation on A PC or Laptop).
There are three types of packages here:
1. A small NetInstaller that lets you download the needed packages during installation (about 500MB).
2. A larger Live image with the default Kali installation (About 3GB).
3. And the main Installer image that lacks a Live CD feature but contains all Kali packages, perfect for offline use (About 4GB).
Please note that each image also offers 32- and 64-bit versions.
The second method to install Kali on a virtual machine is to download a pre-built Kali machine image and import it into your virtual machine software. This method works with both Vmware and VirtualBox, and their respective files (32- & 64-bit) are available at Offensive security
After download, just open up VirtualBox and select “Import Appliance”. If you are using VMware, then select “Open a Virtual Machine”. Next, navigate to the folder where your downloaded file is located and select it. Then click on “Import” and accept the license agreements to start the import. You can tweak the machine’s resource settings later.
Full Installation on A PC or Laptop
For a full Kali Linux installation, you are free to either install a 32-bit or 64-bit system, as well as to decide on the individual packages you want to install if you are using the main Installer.
It also offers you the choice of using either a graphical or text-based process, as well as a speech-based installation and other advanced options.
How to Install Kali Linux
Following are the steps to install Kali Linux.
Step 1: Ready the installation media
Your first step should be downloading the installation image file and making an installer from it. Download your preferred file from. You will also need to download a startup disk maker such as Rufus or a similar tool. And finally, you need a thumb drive with a 4GB or higher capacity.
The Kali download page includes methods to check the authenticity of the downloaded package. Do that first, then start Rufus, insert your thumb drive, select the thumb drive and the ISO image file in Rufus, then click Start.
Wait for the program to finish creating your startup disk before ejecting the drive and closing it.
Step 2: Boot
This is where you start your computer with the installation media inserted. You may need to disable secure boot if you have a UEFI-secured computer. To do that, hit the key that is shown at startup. It could be F2, F10, or any other key depending on your computer’s make.
Find the ‘boot option’ or ‘boot setup’ tab on your UEFI settings page and turn off secure boot. Also, make sure that USB comes before hard-disk in your boot sequence. This boot sequence setting is necessary for both UEFI and BIOS systems. Then save and exit the settings page.
Step 3: Basic Installation Setup
Once the installation media boots, you will be prompted with an installation menu, depending on the ISO image you downloaded. Choose between text and graphical installation types. Then set up your language, location, and keyboard layout in the next steps.
You will also need to set up your computer’s host and domain names. Each of these steps comes with instructions so you will always know what you are doing.
Finally, set up your username, password, and the system clock to complete this step of the basic installation setup.
Do not lose or forget your username and password. Write them down, if you have to.
Step 4: Disk Preparation
This is where you set up your hard-disk and it comes with many options. The easiest solution is to use a completely clean disk, so you can just select its first option and move on.
If, however, you have data on the disk that you want to preserve, Kali offers you the opportunity to either install on the largest free space or to let you do it manually.
Disk partitioning and formatting is an advanced computer topic. So, if you are installing Kali with a clean disk for learning purposes, then it would not hurt to try the manual option.
Step 5: Install Packages
The next step is the network setup if it is available. Else, it is time to install the packages. Please note that the NetInstaller and Live CD installation images require a network connection to install all the tools. Else, you will just get a basic installation.
If you downloaded the main installer image, however, then you can select the type of tools you want. This includes top10, default, and large, as well as a choice between the different desktop environments like Xfce, GNOME, and KDE Plasma.
Step 6: Install Boot-loader
After you are done with the installation, you still need a boot-loader to enable a system-start after reboot. GRUB is the preferred boot-loader here and it is easy to install. But if you have another operating system on the same machine, then you should set GRUB to dual-booting.
Step 7: Reboot
That’s it. Once the boot-loader is installed, you are done. All you need now is to reboot the system, and if all works out well, you can log into your new Kali Linux operating system.
Conclusion
You have seen how powerful and yet flexible Kali is. There are many ways to install the system and you are also free to customize it to your taste.
Kali Linux is surely not for everyone. But if you have an interest in network- or online-security or you are considering becoming an ethical hacker, then any of the above installation methods should help you further.


